How To Make A Wooden Bowl
I often have folks asking where they can see a “step by step” directive of how to make a handmade wooden bowl. I know of no book or magazine that shows this, and due to the good possibility of a serious accident that could easily result in severe injury – it may be a liability issue. So before I go any further let me post the following disclaimer/warning:
Making a handmade wooden bowl is a process that uses extremely sharp tools for extended periods of time that could easily be from 10 to 14 or more hours. Getting tired while swinging a sharp tool is an easy way to drop the tool and experience severe cuts (don’t ask me how I know!). This alone should discourage most folks from trying it. I have performed my craft before millions of people, both on TV and the crowds I entertained during my 10 years as a “paid display artist” at the NC State Fair. It’s strenuous work and you’re always just one “bad swing” away from destroying many hours of hard work or severe injury. So – as the TV shows always say, “Please don’t try this at home”. Now with that being said — Here is my “step by step” instructions on the way that I make bowls.
VIEW THIS PAGE ON YOUR PC FOR BEST DETAIL AS YOUR PHONE WILL NOT SHOW SOME OF THE LINES!
(1)
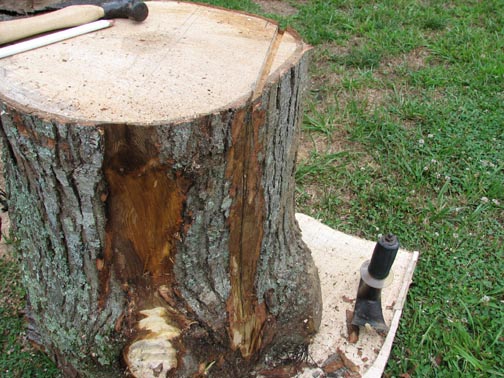
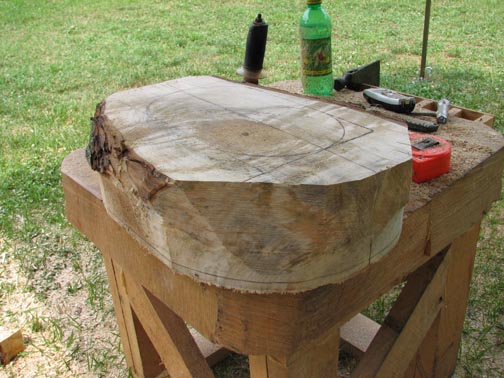
I usually start off with a 2 foot section of a log that has been cut fairly flat across each end. I evaluate this to find any beauty that God hid in there for me to find, and also to see where any cracks or bad spots may be – which could ruin your bowl before you even get started good. Notice in this piece there’s a burl on the right side, and a limb knot on the side facing you. In this bowl I will have the limb knot almost at the rim and will position my block to be cut with the burl mainly in the bottom so that I can get both in the same bowl. I’ll cut straight down thru the block, keeping the block flat.
(2)
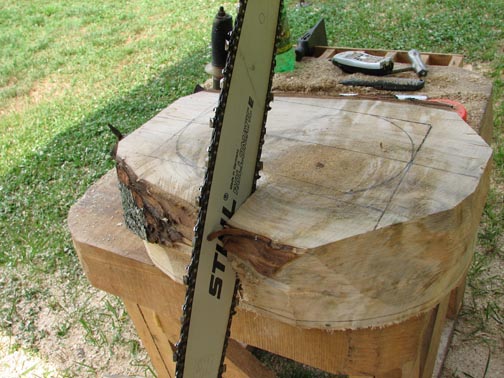
Now measure over about 5 inches and cut straight thru again. If ripping it with a chainsaw, it’s best to have a very sharp chain and a very steady hand. I did this for the first 5-600 bowls I made before buying a custom bandsaw mill.
(3)
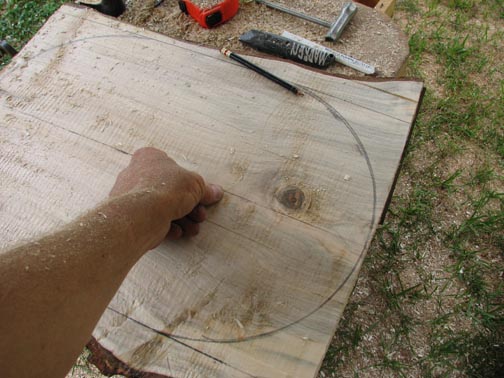
I still use a pencil with a string tied around it for my compass and after drawing where I want the sides of the bowl to be. Depending on the shape of the wood and the desired shape I want for the bowl it may end up oval, rectangular, roundish or egg shaped. The wood will often dictate the design so it may not all be up to you. If there’s a bad place you can’t fix, you may need to modify the shape.
(4)
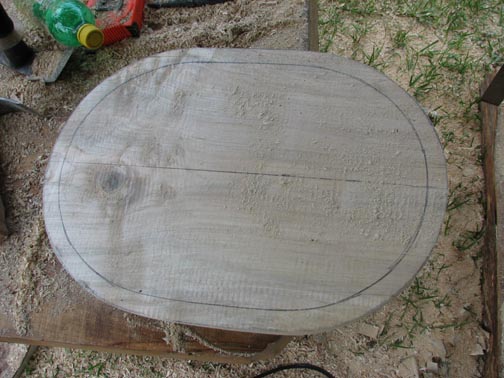
Here’s the top view of the block after cutting around the ends. I also made a pencil mark around the rim of the bowl (on the side of the bowls top rim) which is a line we will not want to cut across in our next step.
(5)
After turning the block over (Top down/ Bottom up) transfer your center line from the Top up the ends and across the bottom (using a framing square to do this makes it simple) Now here’s where the symmetrical shape comes in. By having the center known – you can measure equally on either side of this line to insure the bottom is in the center, and as wide or narrow as you’d like it to be. Next you’ll measure in from each end to have the ends of the bottom symmetrical and to also have both ends the exact same angle. Symmetry is very important to me. Use your pencil with a string on it to draw in the ends of the bottom.
(6)
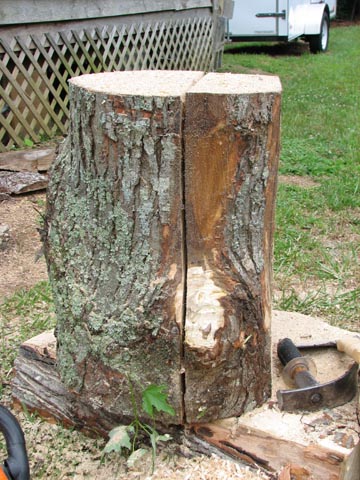
Back in the pioneer days a cross cut saw would have been used next to saw from this “Bottom Line” almost to the top line (see the picture above). You can take 45 minutes to do this with a cross cut – or 2 minutes with a chainsaw – your choice. Believe me, if you’re wanting to punish yourself save your energy because after these cuts are made you’ll find yourself with a good 7-12 hours of chopping if you’re using maple or other hardwoods, and around 5 hours on poplar. My body has been so badly abused (4 shoulder surgeries and 7 on my hands) I urge you to “work smart” when you can. Don’t cripple yourself up like I did.
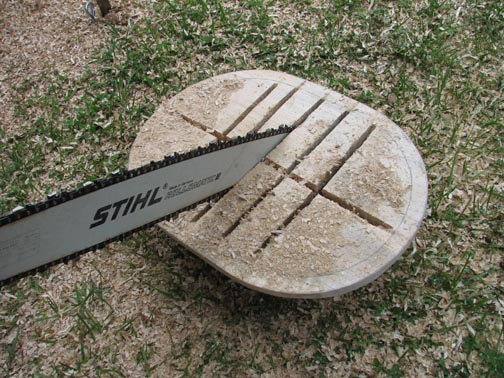
(7)
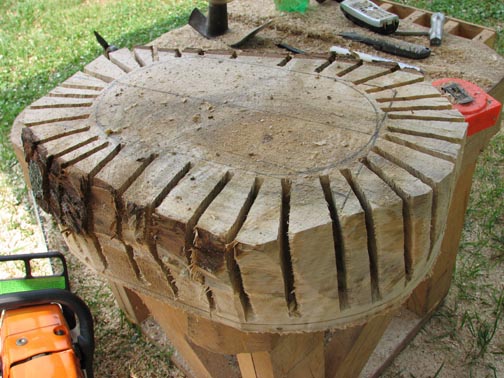
I will normally make around 30 relief cuts around the bowl. This does several things … It insures the sides are the same angle , the bottom on each end is the same, and the over-all symmetry of the bowl. It also gives a visual reference as to how deep you’ll need to cut. The cuts running across the grain (along the bowls sides) will help you knock the side chocks off easier than if the side was all left as one piece, and will help out a little on chipping the end grain. Be careful with the adze – it should be very sharp and cutting the sides and the end grain puts your legs real close to the blade and it will go to the bone real quick (yep, done that too) . The outside of the bowl can easily take 3 hours to chop down to smooth. As you get nearer the bottom of the cuts, start really paying close attention to “is the adze cutting clean or is it starting to pull”. Be prepared to change angles “a little or a lot” depending on the grain of the wood.
(8)
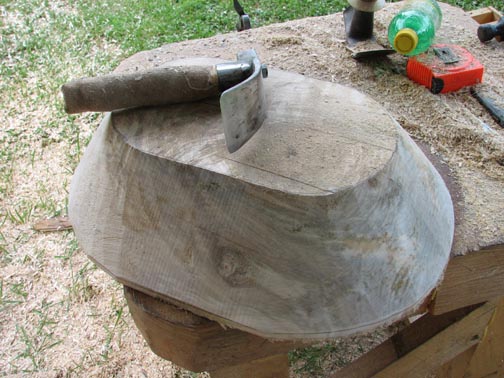
Here’s the bowl with the outside pretty much chipped out. The adze I use for the outside was custom made for me by Don Dillon, a dear friend I worked with for probably 20 years perfecting the hand adzes he made. There was very few that left his shop without me using it a few minutes to “tune it up”. This particular adze is called a “flat adze” no curve or “sweep” to the end – very similar to the old “Cooper’s adzes” of the 1850’s well known for their usage in making wine barrel stays, and were often called “barrel adzes”. Mine is 21 ounces instead of over 2.5 pounds for the barrel adze. The main advantage of using a flat adze on the outside of the bowl is that it won’t leave grooves in the bowl as you cut as does the #3 sweep adzes that most folks use.
(9)
Now flip the bowl back over – top side up. I’ve told folks for years that the average person wanting to make a bowl with an adze will get about 3-4 hours into it before he realizes what kind of mess he’s gotten himself into … all that chopping and you ain’t even halfway there… Check out the “relief cuts” I make with my chainsaw on the inside of the bowl. These are not measured. I usually cut them about 2.5 – 3 inches deep. They are simply here to help you knock out some chocks so you can start carving. Some folks don’t approve of these cuts, but again I say – you got plenty of chopping to do yet and if they can save your shoulder a little – you’ll benefit from it when you get older. The average bowl has 10-12,000 chips of wood come out of it. That’s a ton of beating. Be extra careful to stay in tune with your adze … you’ve got this far – don’t mess it up now!

(10)
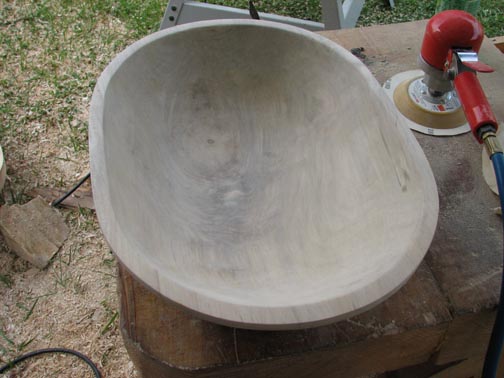
This is the inside after you have removed all the wood. Working in ever widening circles always helps me to keep the bowl the correct shape. Use your thumb and index finger as your depth gauges and be sure to BLEND the sides of the bowl into the bottom. If you do this right the sides will flow into the bottom and this gentle curve greatly improves the usability of the bowl and helps the wrists of those using the bowl (especially for kneeding). I try to think of everything I can to make it the best bowl that it can be. After chipping out the bowl I sand it with 40 grit paper (inside and out) until all tool marks are removed, then follow that with 80, 120, and 220 grit. Getting it extremely smooth serves two purposes. If you leave it rougher (let’s say 80 grit) some of the grain doesn’t cut clean – lays down instead, and as it dries it makes the bowl look “fuzzy”. Going at least 120 stops this. Also the smoother you get the bowl – the easier it will be to get it clean. Any roughness at all will be harder to thoroughly clean and folks this day are so worried about germs you got to try and think of everything.
(11)
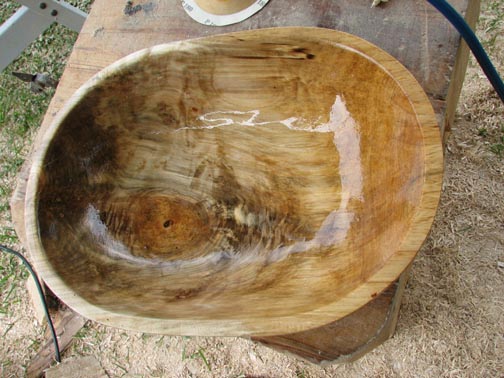
This picture was taken 2 minutes after the previous one and the only difference is the addition of “Mineral Oil” . I use the oil to “dry” the bowl. I’ve had folks ask me, “why do you put oil on it to dry it out?” I work my bowls “green” – you have to with hand tools, and the sap comes out quick. A bowl made today will crack before tomorrow if not treated. Some folks put them in paper bags, some cover them with sawdust. You do what you want – but after all I go thru making these bowls I’m going for the nearest thing to 100% certain it ain’t gonna crack except for where I want it to (I like limb knots to crack) and that can be easily fixed. I don’t sell bowls that crack in the rims – I bust them and they go in the firewood. A bowl that starts off as 15″ wide x 4 3/4″ deep – will lose about 3/4 inch of width and a quarter inch or so of depth. The mineral oil replaces the sap then I can control the drying time. What you get in a store or pharmacy is 70 weight (about like water) I use 250,350 or 500 at times depending on temperature and drying conditions.
(12)
Here’s my favorite adzes – the 1 laying beside the bowl is the most special one that Don ever made me. You’ll find the right weight for you. 19-21 ounces is my weight. The balance is very important especially if you’re going to make more than just a few. I never intended to make over 2,400 bowls but when you work for a textile mill and don’t make much money, you utilize whatever talents you have to pay the bills. I was lucky that folks got to seeing my bowls and loved the quality of what they were seeing and a satisfied customer is your very best advertisement. A few becomes a lot right quick when you stay at it. I make each one the best I can or my name never goes on the bottom of it. If I can answer any questions for you feel free to contact me.
To buy your own adzes, I suggest “Jason Lonon”. He’s listed on my Links page. https://www.jasonlonontoolmaker.com